Close
Technical Support:
1.877.694.4932
(8 a.m. - 8 p.m. EST)
Surface Patching & Repair Guide
Prepping your surfaces is an essential part of every paint project. Before applying primer or paint, take the time to patch any holes and repair cracks, dents, or chips in your walls. This extra step will help your final painted surfaces look like new. Patching and repairing interior surfaces is a slightly different process than exterior. Exterior patching and repair require different steps for each surface type. Get tips on interior and exterior prep.

Patching Interior Surfaces
Patching interior walls doesn't have to take long and is an important part of painting prep. Repair gouges, dents, and holes with joint compound or spackling, then sand the area smooth. Larger holes may require a self-adhesive mesh patch for extra reinforcement.

Patching a Textured Wall
If you are filling holes or cracks on a textured wall, you may end up with a smooth area that does not match the rest of the surface. To avoid this, make sure you use the right type of patch. "Orange peel" and "knockdown" are the two most common wall textures, and they can be easily matched. For larger coverage, use the Homax Wall Texture Mix and Pneumatic Spray Gun and Hopper to hide flaws.
Patching Exterior Surfaces
When prepping and patching your building exteriors before your paint project, you will need to consider the surface. Exteriors are typically made of more durable materials, like brick, cement, metal, etc., and require specific detailing for each. Here are some tips for patching and repairing the various types of surfaces:
Brick Patch & Repair
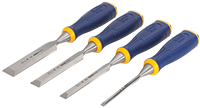
- Use a chisel to chip away loose pieces of brick and remove excess dust by brushing the surface of the brick.
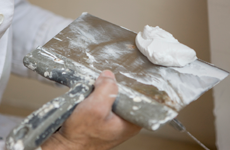
- Using a trowel, press concrete mortar into the chipped areas.
- Press broken pieces of brick back into the mortar while it is still wet to give the brick the appearance of a solid brick.
- For surface cracks 1⁄ 8 inch wide or less, fill them with an epoxy-based patch kit.
Concrete Patch & Repair
- Remove any flaking concrete with a hammer and chisel or masonry grinding disk and portable drill. Then, using a stiff brush and concrete cleaner, scrub away dirt, grease, or other debris before making repairs. Rinse thoroughly after cleaning.
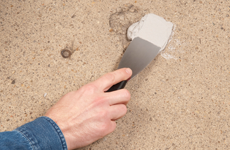
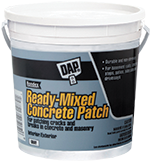
- Follow the instructions on the patching product; use vinyl patch for small cracks and chips or concrete compound for nonstructural, aesthetic repairs.
- Press the patch material in with a trowel in layers and smooth until it is level with the existing concrete layer.
- Allow the area to dry completely. Block off the area for 24 hours and at least three days for vehicle traffic.
Stucco Patch & Repair
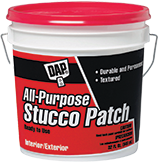
- For cracks 1⁄ 4 inch wide or less, widen the crack to a minimum of 1⁄ 2 inch using a chisel and hammer, beveling the edges of the crack into an inverted 'V' shape. Remove loose dust and debris with a brush.
- Fill in the crack using stucco-safe caulk. Cut the caulk tube's tip to the width of the crack before loading caulking gun.
- Apply a steady bead of caulk deep into the crack.
- Spread the texture with a wet trowel to achieve a smooth finish.
- Allow caulk to dry for 24 hours before applying paint. If the crack is wider than 1⁄ 2 inch, apply premixed stucco patches in multiple layers, allowing each layer to completely dry before applying the next.
Metal Patch & Repair

- Sand the area around holes until you reach bare metal. Remove dust with a vacuum.
- Apply rust remover to any rusty areas and use a wire brush to clean off dirt.
- Use degreasing cleaner and a cloth to clean off any grease or oils.
- Apply a smooth layer of bonding filler with a plastic putty knife. Be sure to follow the manufacturer's instructions to successfully mix and harden the filler.
- Allow the filler to dry completely.
- Sand the patch with medium-grit sandpaper. Clean off any dust before painting.
Wood Patch & Repair
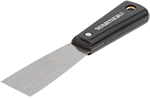
- Use a paint scraper or putty knife to scrape any loose paint from around the area to be repaired. Remove any rot with an awl or a flat head screwdriver.
- Sand the surface with 120-grit sandpaper to create a smooth surface.
- Use an epoxy wood filler made for exterior applications. Follow the manufacturer's instructions on preparing the epoxy.
- Apply the epoxy with a putty knife and flatten it around the area you are repairing. Let the filler harden.
- Sand again with 120-grit sandpaper to smooth the surface.
Plastic Patch & Repair
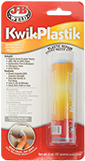
- Select an epoxy putty, and follow the manufacturer's mixing instructions to form a polymer compound that can be molded or built up.
- For larger holes, use a 1 1⁄ 2 inch putty knife. Allow the epoxy to dry for several hours.
- Typically the compound can be sanded, sawed, drilled, and carved if necessary. If sanding, use 120-grit sandpaper. Wipe away any dust with a clean rag.
- Do not use a primer, and use only acrylic paint to cover.