Close
Technical Support:
1.877.694.4932
(8 a.m. - 8 p.m. EST)
Interior Paint & Preparation Guide
Keep walls and doors looking flawless and freshly painted. A simple paint touch-up may be all that's needed. Other times repainting the entire surface will be necessary. These interior paint guidelines will help you decide which interior paint is right for your project and budget.
Deciding to Touch-up or Repaint
Not sure which to do? Here are some tips on helping you decide between touch-up and repainting:
Touch-up paint if you:
- Have the original color from the original batch
- Can match the existing texture or brush technique
- Want to cover minor scratches and scuff marks
Repaint if you:
- Want a cleaner, more uniform look
- Want a different color
- Made repairs to the drywall
- Cannot locate the original color and batch
When a full painting project is called for, it is best to remember the four P's— prep, patch, prime, and paint.
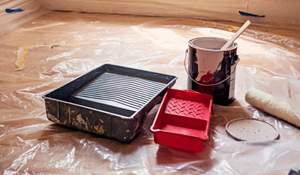
Interior Painting Prep
Taking the time to prepare walls, doors, and other areas will make interior painting projects easier and more successful. Make sure you have the right tools on hand to complete the project and follow these tips to prepare for painting:
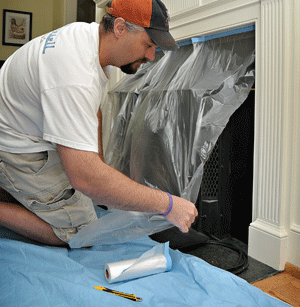
- Clear the room: Remove all furniture and wall hangings, window coverings, door knobs, light switches, and outlet plates. Working in an empty room is ideal—you minimize risk of accidents and spills, and have more room for tools and equipment. However, if there are items that can't be removed, put them in the center of the room and protect them with plastic covers.
- Patch and repair walls: Fill in any nail holes or dents with putty or spackle. Caulk cracks and gaps in the trim. Learn more about the various types of caulk to be sure you use the right kind for your project. Once the patch is set and dry, lightly sand walls to ensure a smooth surface. Learn more about patching and repair.
- Clean the walls: Wipe down walls, floors, and baseboards with a damp cloth or mop. Remove cobwebs and dust. Kill mildew using a cleaner or three parts water and one part bleach. This mix will also clean away dust, dirt, handprints, etc.
- Protect the floors: Use masking paper to cover the floor around the edges of the room, where paint may drip or spill.
- Tape off: Cover any woodwork, light switches, window frames, baseboards etc., with a good quality painter's tape. Remember, to press down on the edge of the tape to prevent seeping.
- Prime: Apply a primer to walls before the final color.
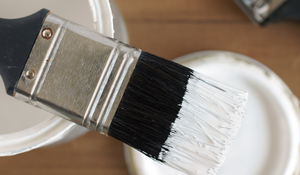
- Cut in around edges: Use an angled brush to cut in with matching color about 1 inch along the ceiling and baseboards.
Prime
Applying a primer coat to your walls will help you get the most from your paint; it ensures your final surface is smooth and even, especially if you have spackled or repaired any holes and dents. Primer will hide stains and help the top coat adhere better.
- Latex primers, or water-based primers, are the best choice for drywall. They dry quickly and will cover any minor stains. Since latex primer is water-based, cleanup is easy.
- Oil-based primers work for a variety of surfaces and are compatible with both oil paints and latex paints. However, oil based primers can take longer to dry, and are not low VOC. Learn more about low VOC paints.
- Shellac primers are typically used to seal wooden surfaces, but can be good for interiors. They can be used with both oil-based and latex paints. Shellac-based primers will cover a variety of stains and even seal in odors. Shellac primers do give off more fumes, and can be difficult to clean from applicators.
Once you have completed your prep work and selected the right primer, make sure you have the right paint for your interior job. Learn more about interior paints.
Paint Cleanup
Keep brushes and rollers in peak condition by properly cleaning them after each use. For latex paint, soap and warm water work really well. For oil-based paint, dip brushes and rollers in solvents such as mineral spirits or paint thinner, squeeze out the excess solution by hand, then hang to dry.
Use this chart to determine which solvents are best for your specific painting application.
| Product to Be Thinned | Solvents to Use |
|---|---|
| Adhesives | Acetone |
| Epoxies | Acetone |
| Fiberglass resins | Acetone |
| Lacquer | Lacquer thinner |
| Oil-based paint | Paint Thinner |
When working with thinners and solvents, always take the necessary safety precautions:
- Read and follow all label instructions
- Wear splash-resistant goggles and chemical-resistant gloves
- Work outdoors or in a well-ventilated indoor area
- Follow local, state, or federal disposal guidelines